

With the introduction of the superb 60L carburetor, the engineers at OS Engines gave modelers what may be the best all around 50-class carburetor on the planet! Superseding the 40E as used on the OS50SX-H, the 60L is used on the 50SX Hyper. Then with the introduction of the 55HZ, they used the 60E instead of the 60L. Meanwhile, the 55HZ-DRS version used something altogether different . . . the 60DRS.
Anyway, because they're all fairly similar, for our purposes, we’re going to focus on tearing down a 60L because if you've seen one OS helicopter carb, you've seen them all.
Note; while the 60L is outwardly similar to the 40E, but because it has a larger 10 mm bore versus 8.5 mm, the engine can draw in more air (and thus consume more fuel). It's more fuel that allows the engine to make more power. Otherwise, what’s inside all of these carburetors – the guts – remains pretty similar.

Also, while to all outward appearances, they're based on the same casting, they're actually not the same. Discerning this is easy as the 40E uses a plastic sleeve on the carburetor body, which shims it to the same 15 mm OD as the all-aluminum 60L carburetor. This results in the two units being physically interchangeable.
In addition, externally, the 60L sports a groove on the carburetor intake, which appears to be primarily designed to aid in the retention of an air filter assembly. Since we had communicated with OS engineers regarding our AUD0063 air filtration system, we have reasonable suspicions this was due to our efforts.
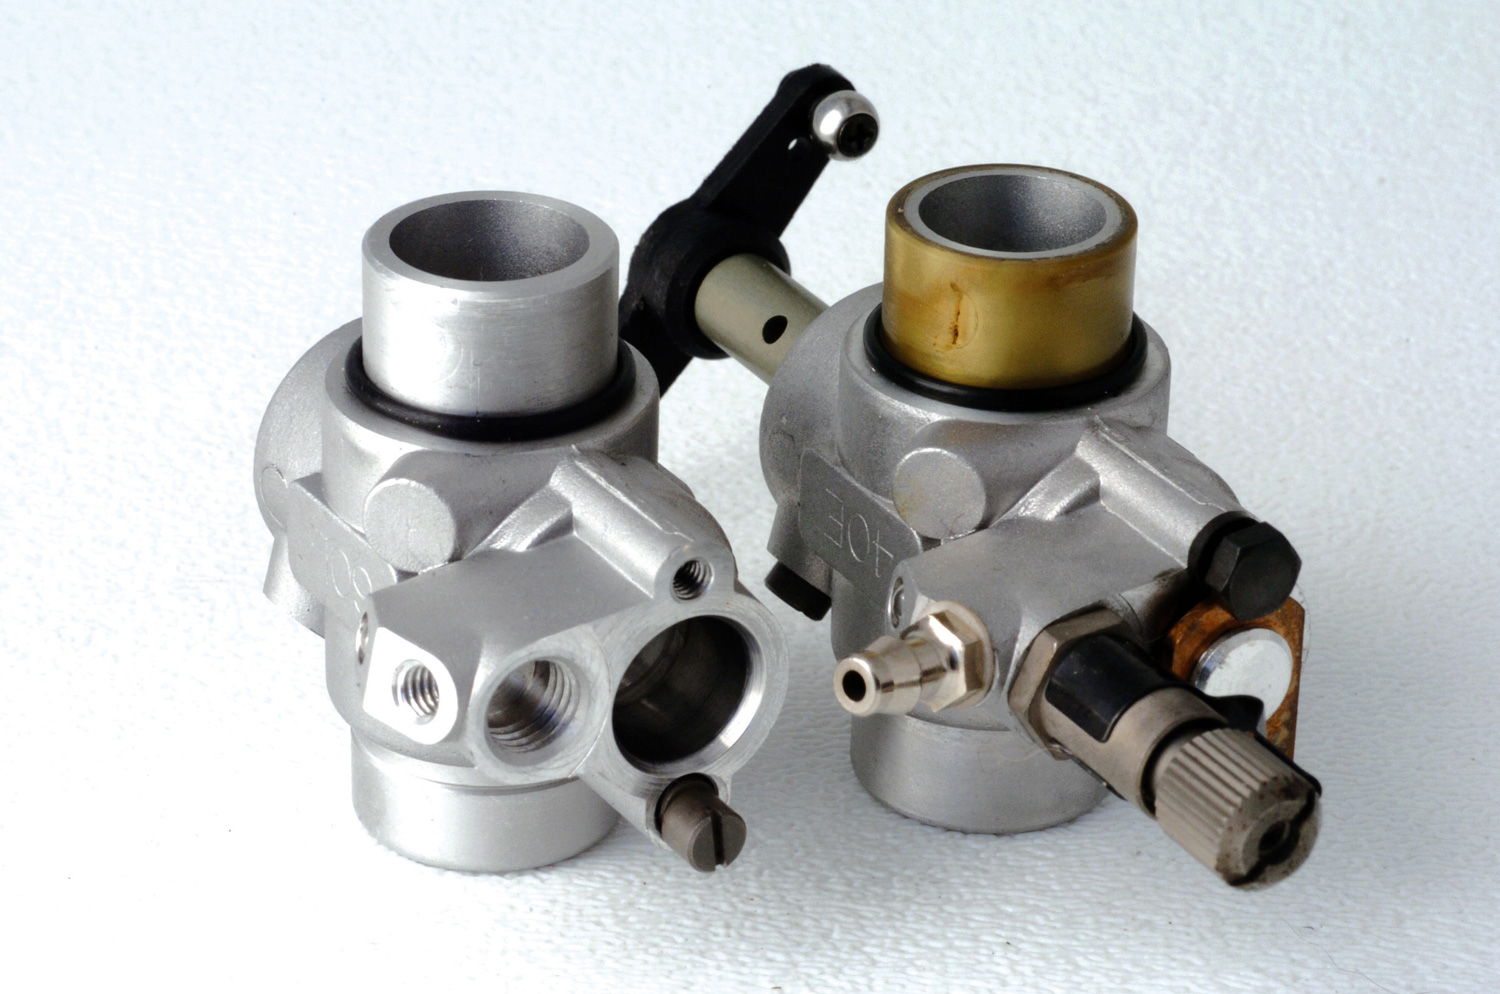
Mechanically these carburetors operate similarly, and the differences between the ones above beyond the larger bore, and the elimination of the plastic sleeve, result in better mid-range performance with the 60L carburetor though internally the parts seem practically the same. Thus, they are identical in operation and for all practical purposes can be treated as the same unit insofar as disassembly and cleaning go.
Low end mixture adjustment is achieved by means of an eccentric machined screw. It controls rotating the mixture control valve chamber in relation to the cat's eye. Interestingly, method is similar to, though more sophisticated due to the precision the cam-action brings, to the adjustment of the old-style Perry carburetors (more later).
TOOLS AND EQUIPMENT
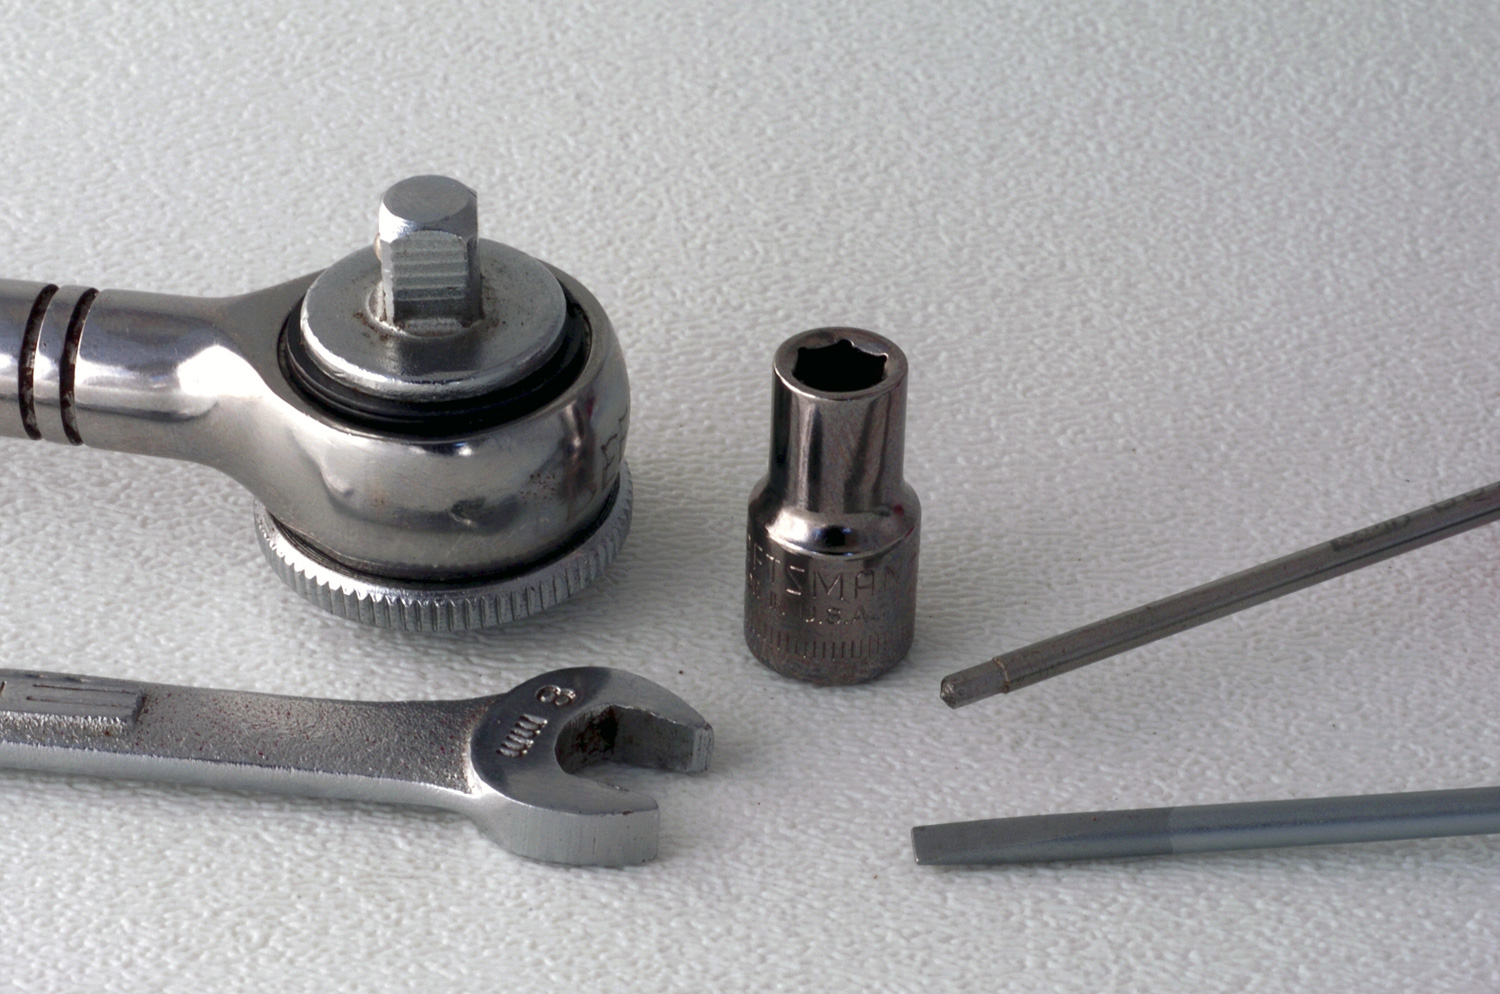
For disassembly/assembly you’ll need a very few basic tools and equipment. A 2 mm Allen driver to remove the carburetor from the engine, a small flat blade screwdriver for removing the guide screw, a ¼” drive 5 mm socket for removing both the fuel nipple and the mixture control valve stopper screw as well as a 1/4" driver, an 8 mm wrench (or parallel-jaw pliers/adjustable wrench) for removing the needle valve assembly body, and a wood or plastic toothpick to aid in removing debris.
Then, for cleaning you’ll also want some type of spray cleaner suitable for aluminum (source this at an auto parts store). You may also find it convenient to have on hand a source of compressed air (be it a a full size unit, a hobby compressor, or even those cans of compressed air used for cleaning computer keyboards and equipment). In addition, an essential piece of equipment due to the fact you'll be working with both compressed air and cleaning chemicals is eye protection!
CARBURETOR DISASSEMBLY
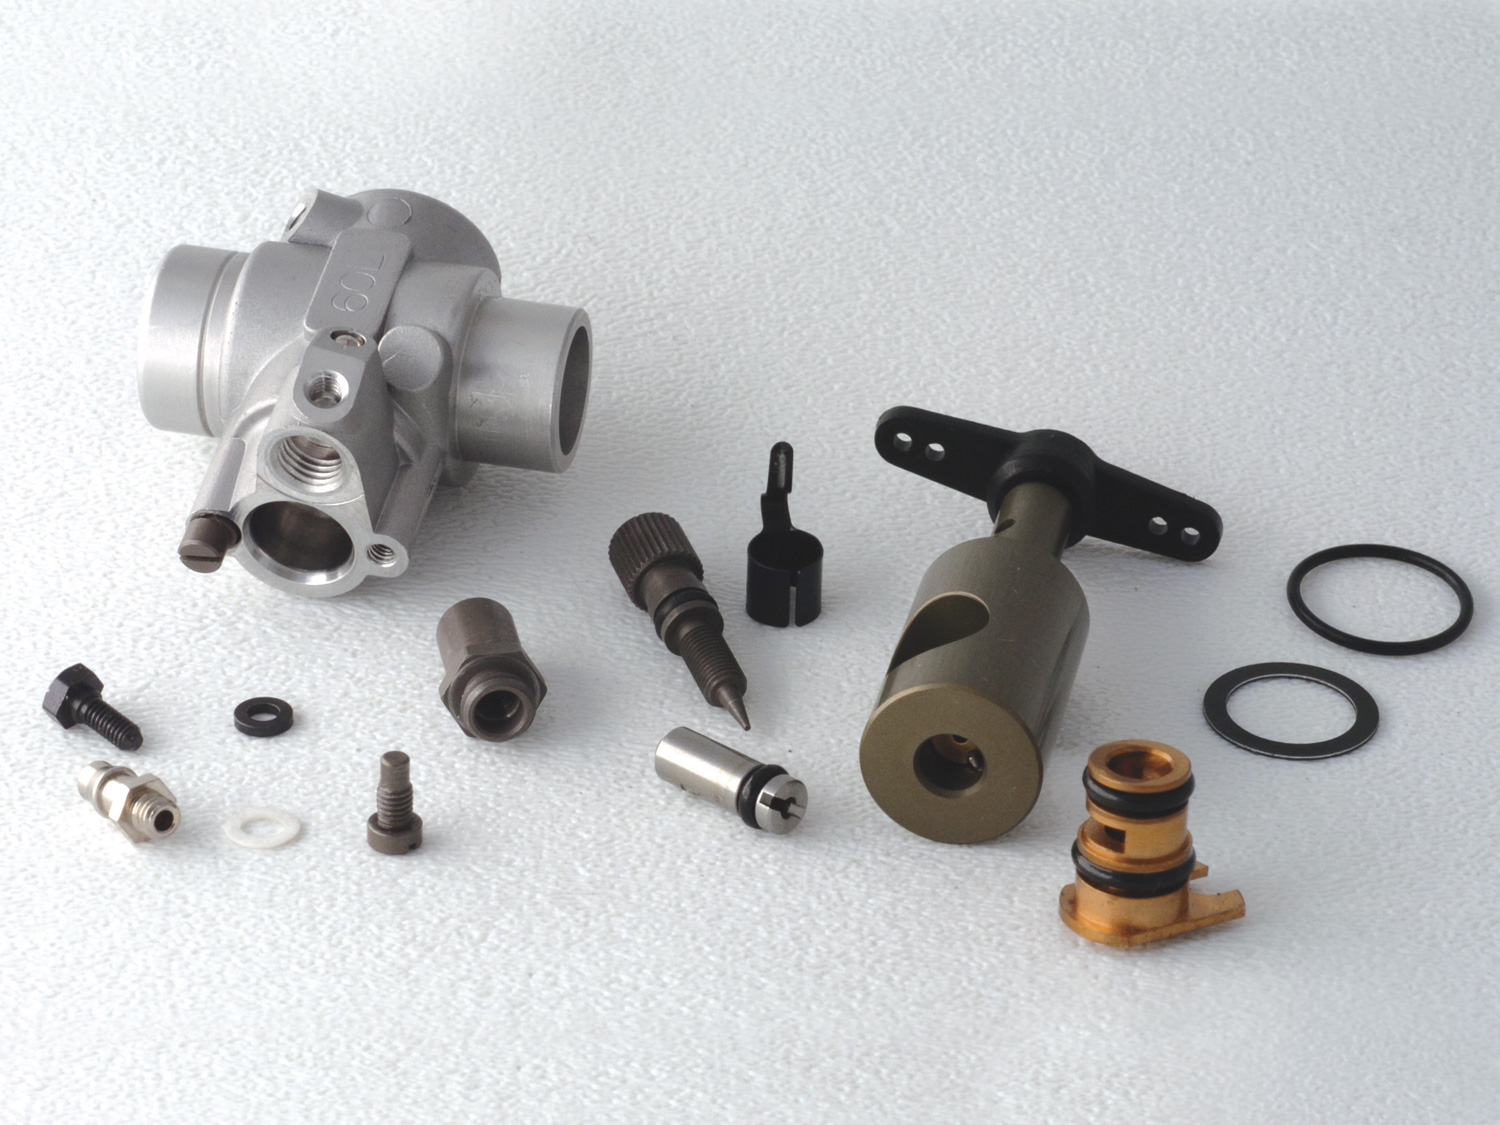
If you suspect carburetor trouble with either of the two OS carburetor as used on the OS Max 50SX-H and 50SX Hyper engines, it may be time to disassemble, inspect, and clean it. It’s a rather simple task though because the parts are small and the passages tiny, you may need a keen eye to discern debris. Furthermore, to prevent losing the low-end mixture setting, it is advisable to not remove the eccentric cam-action screw. As you'll see in the above picture, it has not been disturbed.
DISASSEMBLY
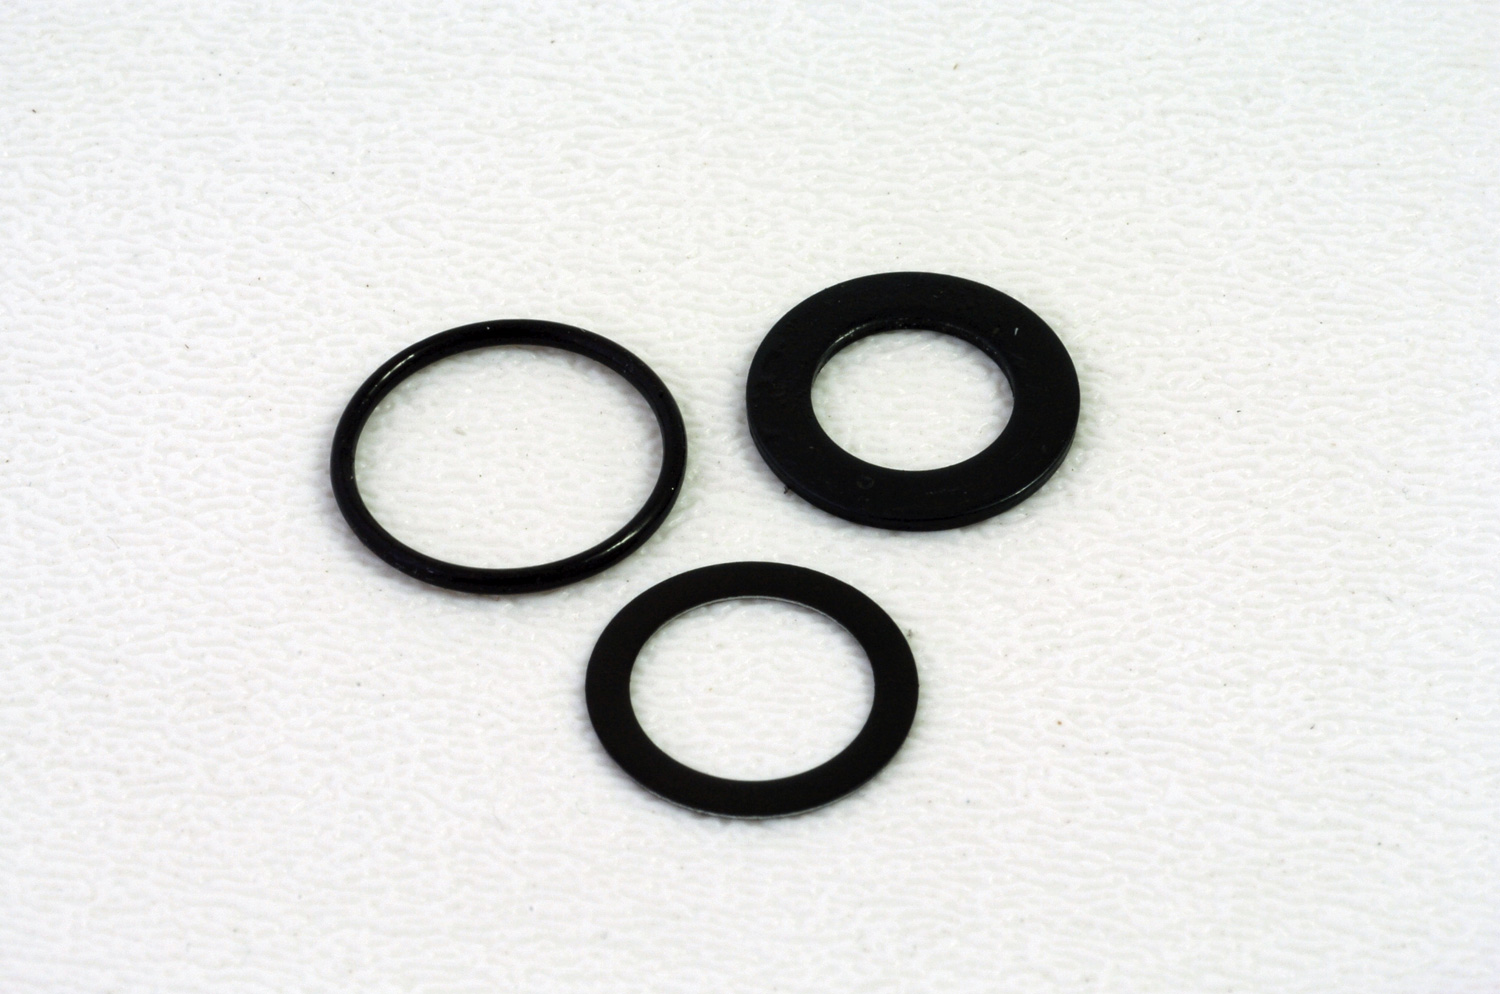
1. Using a 2 mm Allen-driver, loosen the draw-bar assembly and remove carburetor from engine. Remove and inspect the composite washer at the bottom of the crankcase opening as well as the rubber o-ring which seals the base of the carburetor. If these are damaged, they'll need to be replaced.
2. The machine screw in the top of the carb body is the guide which keeps the throttle barrel from falling out. Remove it and ease the barrel out of the carburetor body.
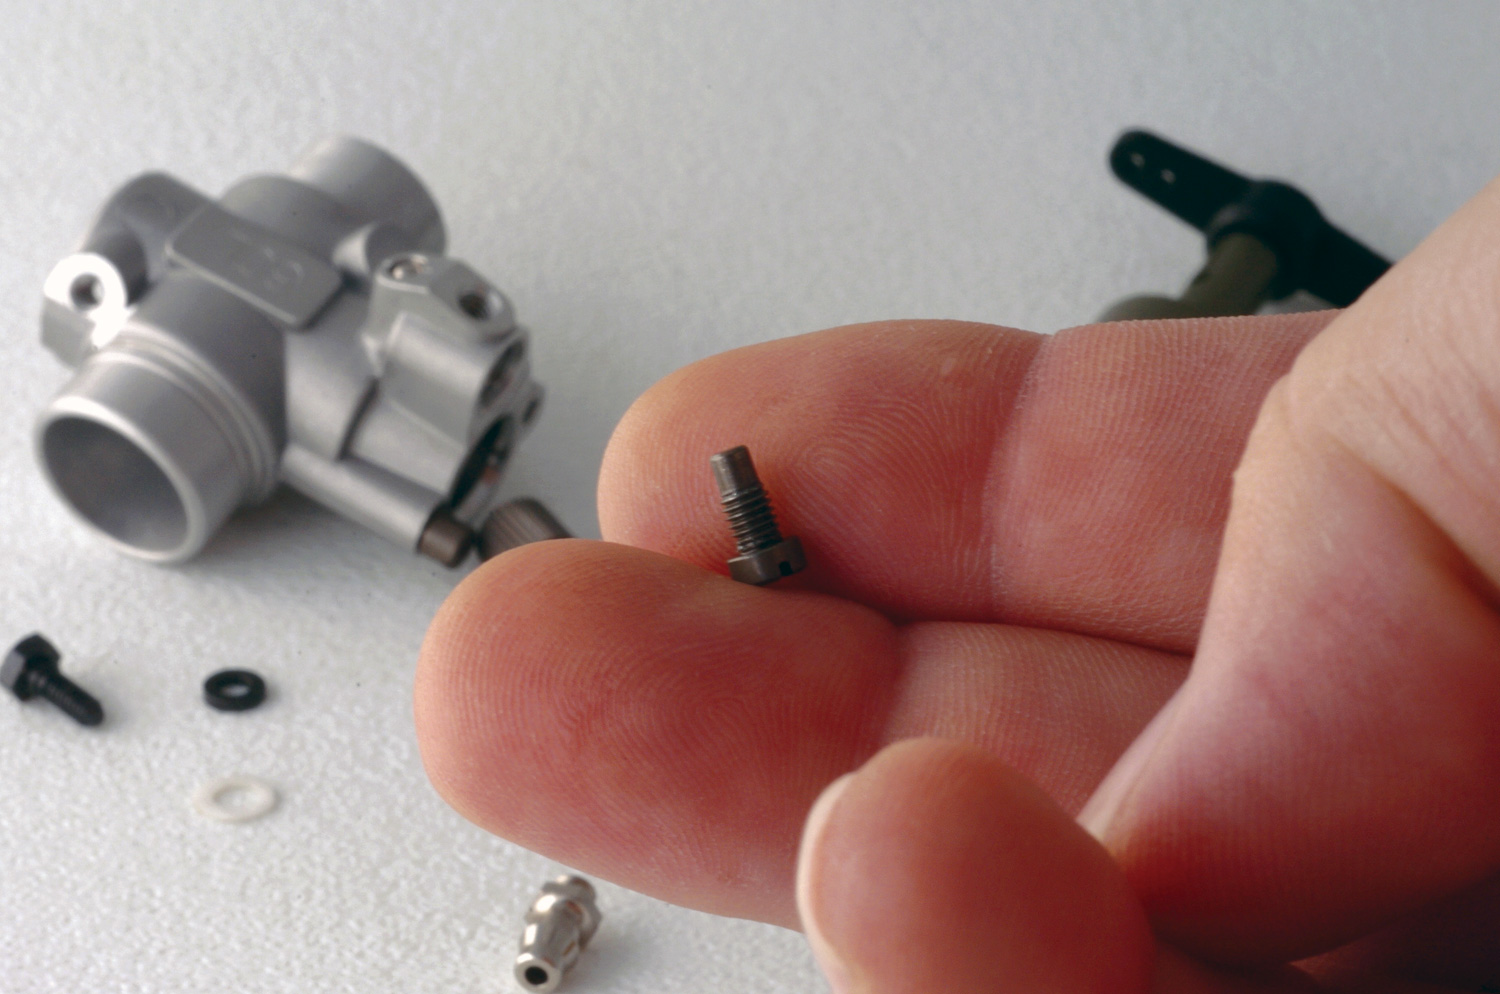
3. Now examine the throttle barrel. Pressed in through the side is a small diameter steel pin whose purpose is partly to accurately locate the spray assembly itself.

Now rotate this assembly so that you're looking at the end of the throttle barrel where you'll see the steel pin serves another function besides providing a stop for the spray assembly.
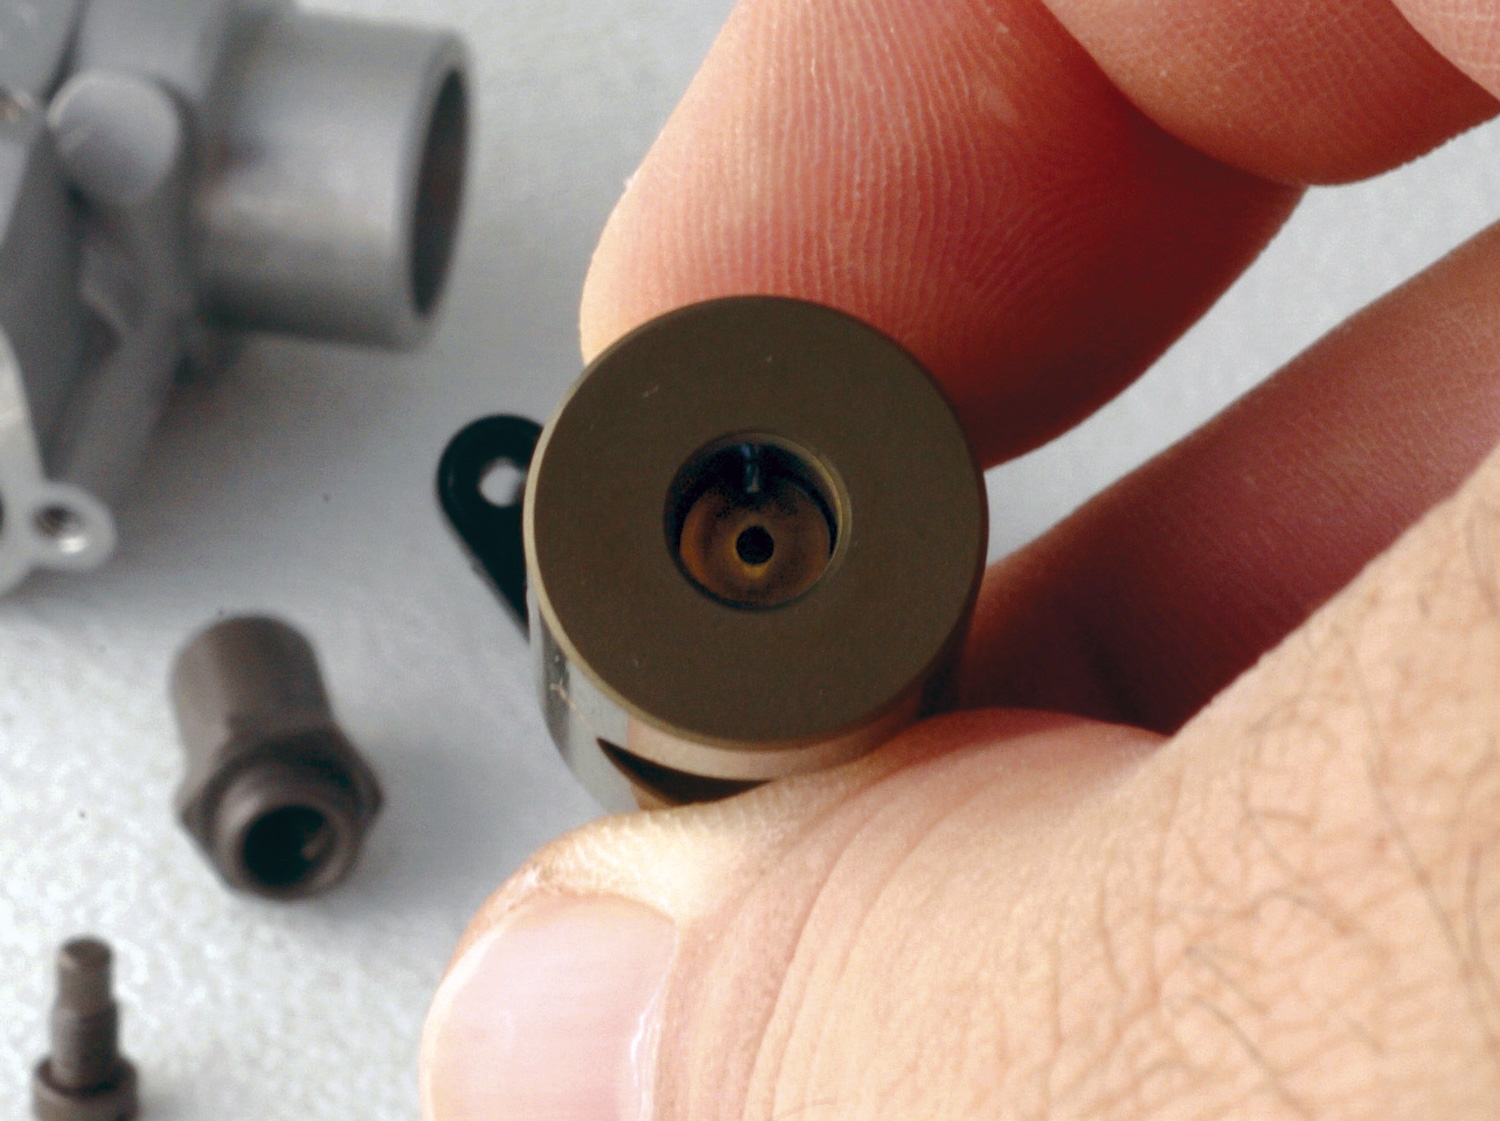
Beyond serving as a stop, this pin also serves to locate the little piece of the mixture assembly I call a cat's eye (for lack of a better word). I call it this because of the cat eye shaped slot machined at one end.
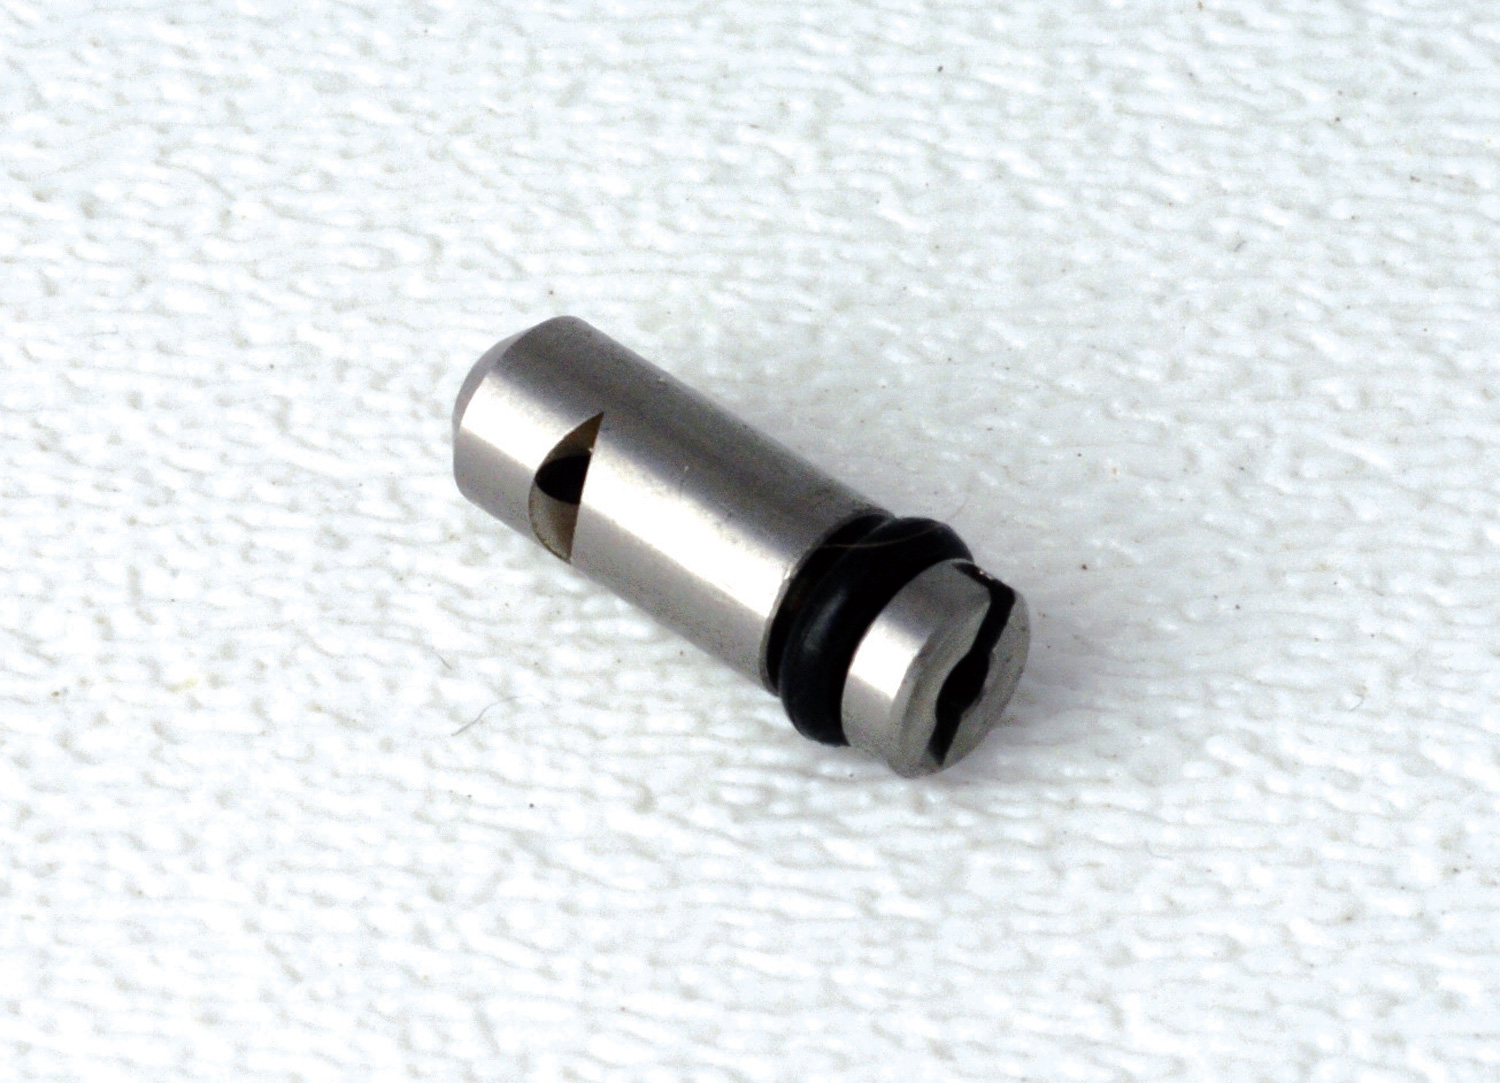
The passage through this piece is also subject to obstruction and for the best way of cleaning this tiny passage, I use spray cleaner and compressed air! However, it's important the spray cleaner you selected be of the kind which won't damage the tiny o-ring . . . you've been warned! Of course, you can remove it first, but getting it off without damage is a matter of holding your tongue just right, plus a bit of luck. Now rotate this little rascal in your fingers so that you can see the slot which engages the pin in the throttle body (to align the piece properly).

4. Note the steel ball pressed into the carb body. It’s held in place when surrounding aluminum was deformed with a punch. Removal of this ball is beyond the scope of this white paper and regardless, isn’t necessary since it’s merely plugging a hole drilled for manufacturing purposes.
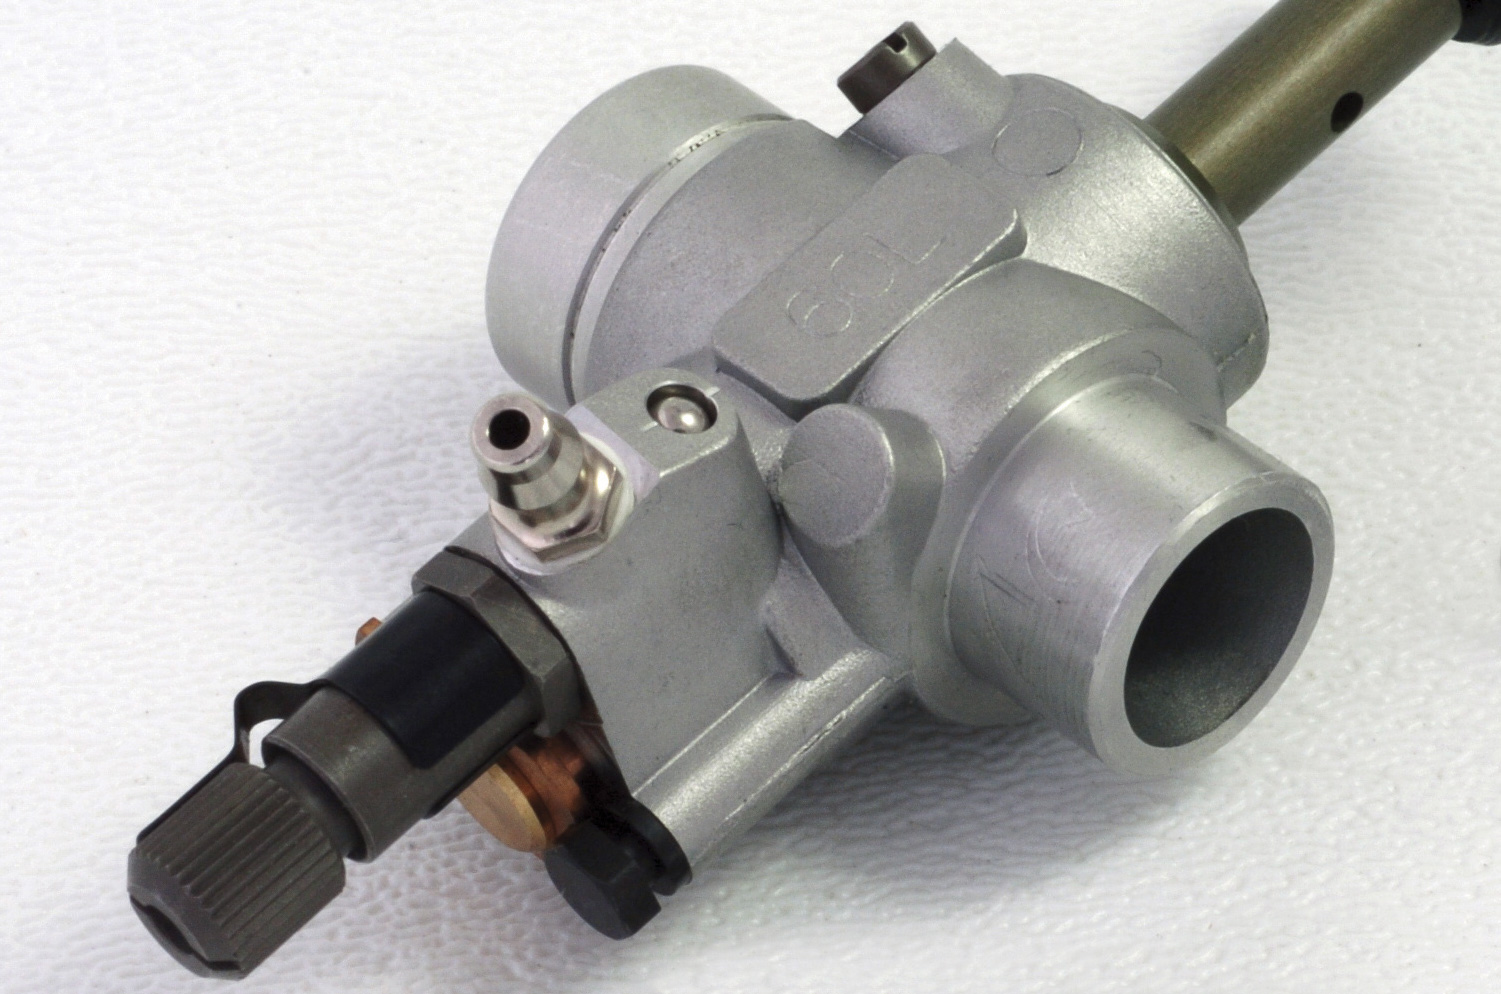
5. Before you remove the main needle, make a note of how many turns it was opened from the closed position. Remove the main needle at this time and inspect both the tiny o-ring and the tip to ensure it’s not been deformed by previous over tightening.
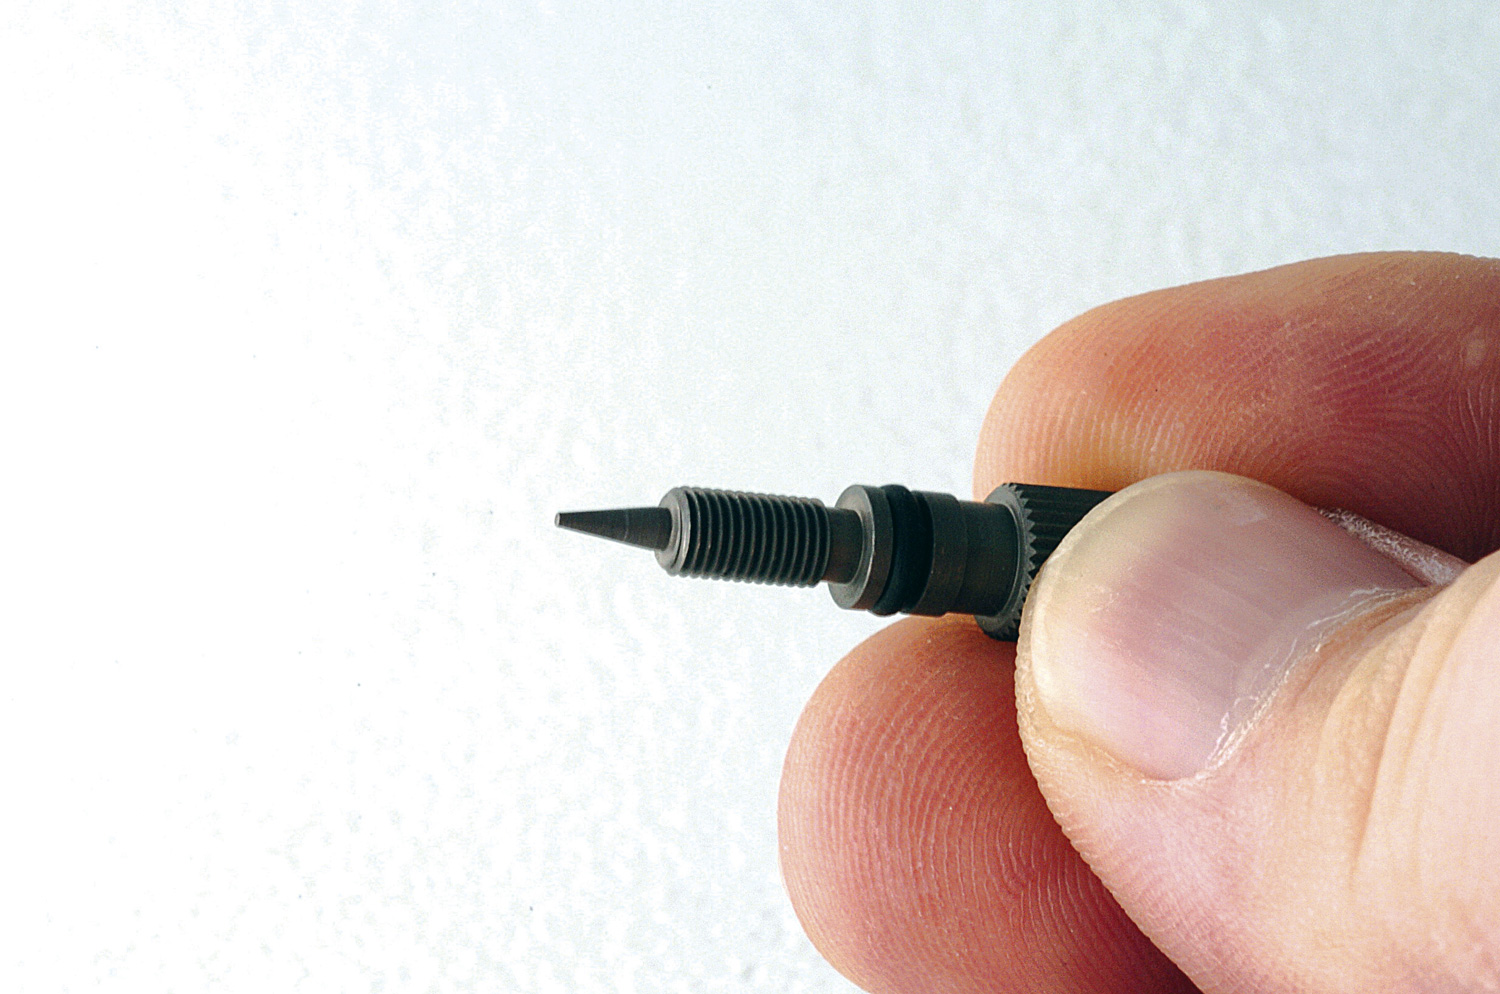
6. Using the 8 mm wrench to loosen it, remove the main needle assembly (where the main needle screws in). This is another prime candidate for trouble as it may hold trash which made it past the fuel filter.
7. Next remove the mixture control valve assembly. Note, however, it’s not necessary to remove the eccentric cam-action screw that performs mixture adjustment!
Use a 5 mm socket, and remove the black hex-head screw which secures it in place.
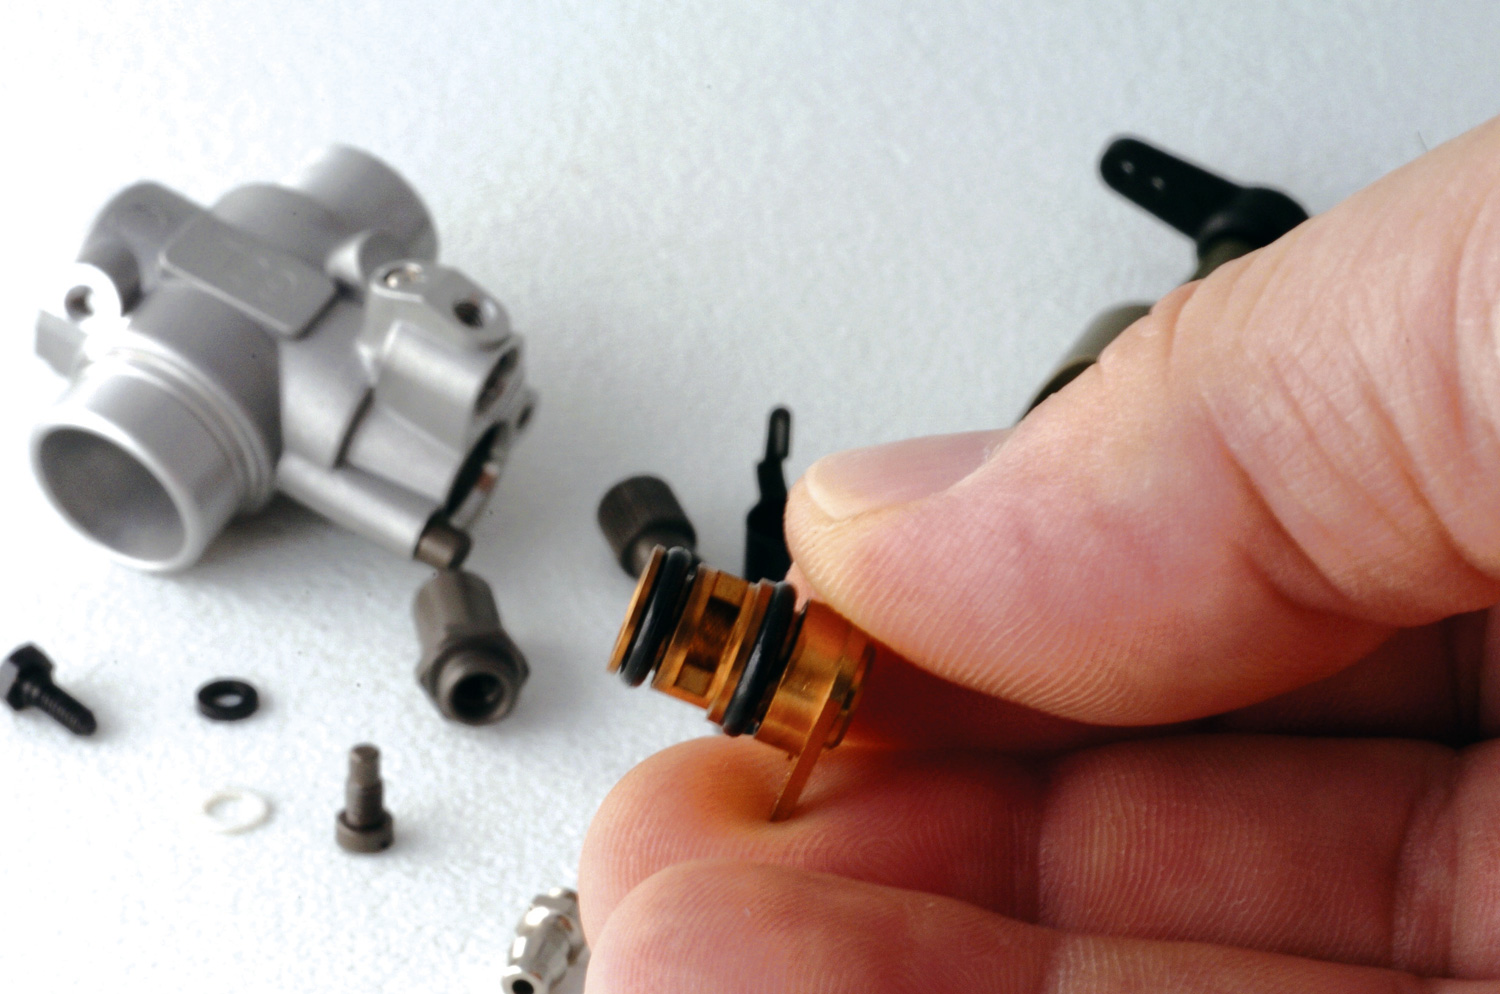
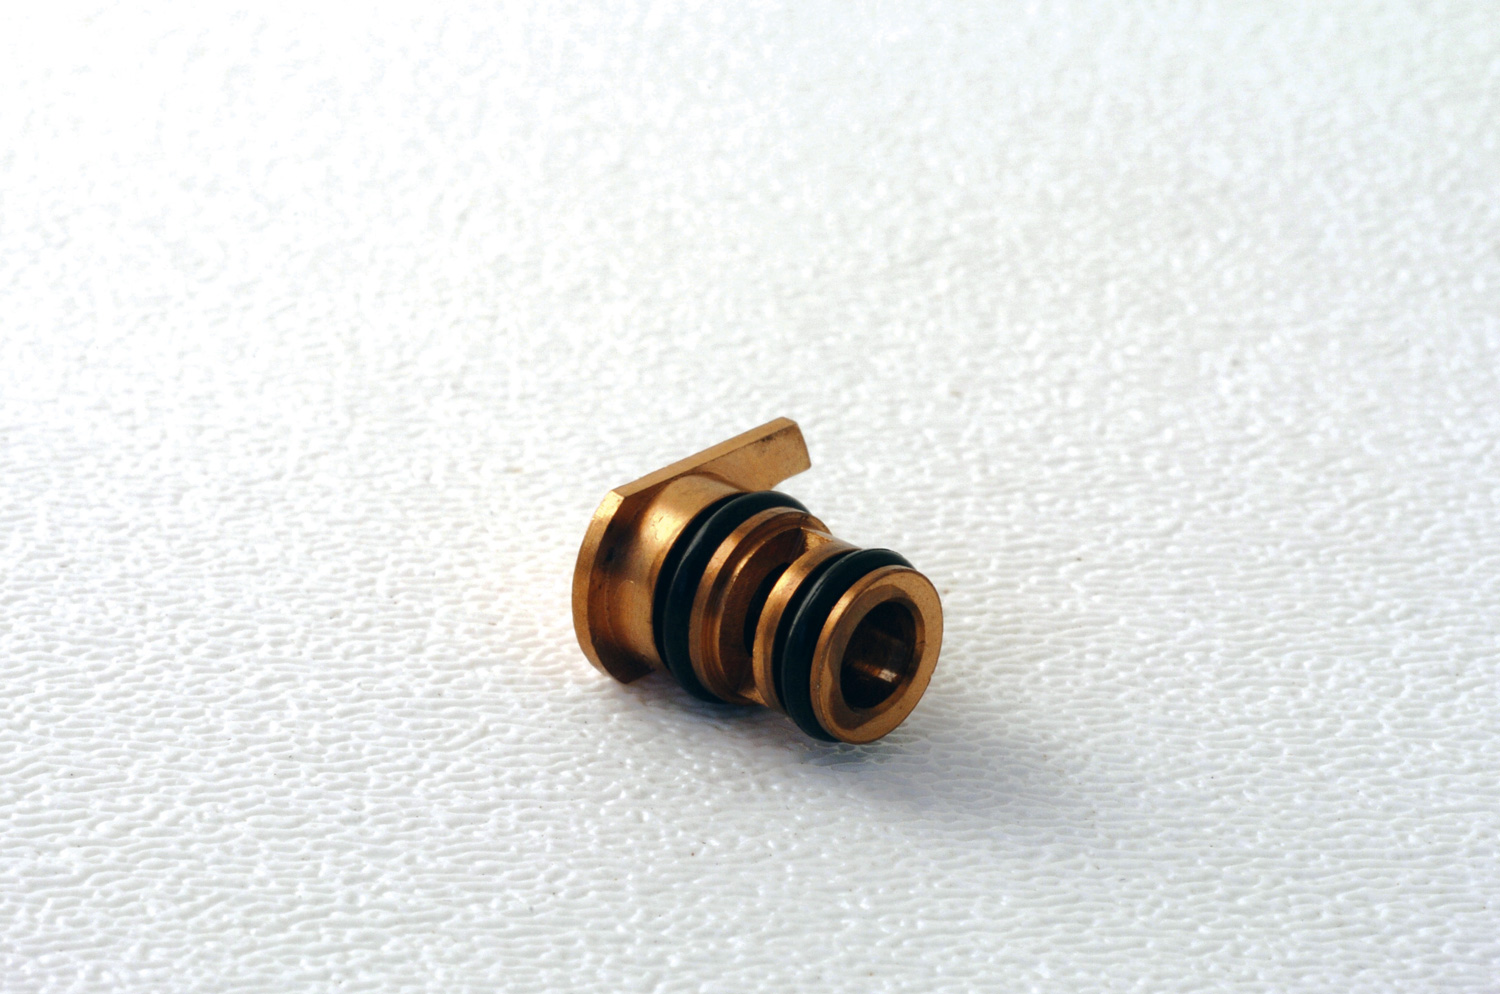
Looking side-on to it, the black hex-head screw appears to have a groove in it, but in reality there's a special thick washer which combines with the screw to retain the brass low-speed mixture assembly in place. Next use the flat blade screw driver and with care pry the brass assembly up and out of the carburetor body. Use your fingernails to grasp it and complete the removal. There's absolutely nothing securing it in place except the drag of the two o-rings on the brass body itself. Just be careful and you'll be fine.
It's now possible to see into the side of the carburetor body. Remember the steel ball I mentioned earlier, look inside and you can where there was a passage drilled for manufacture, now do you understand its purpose, i.e. of connecting two passages?
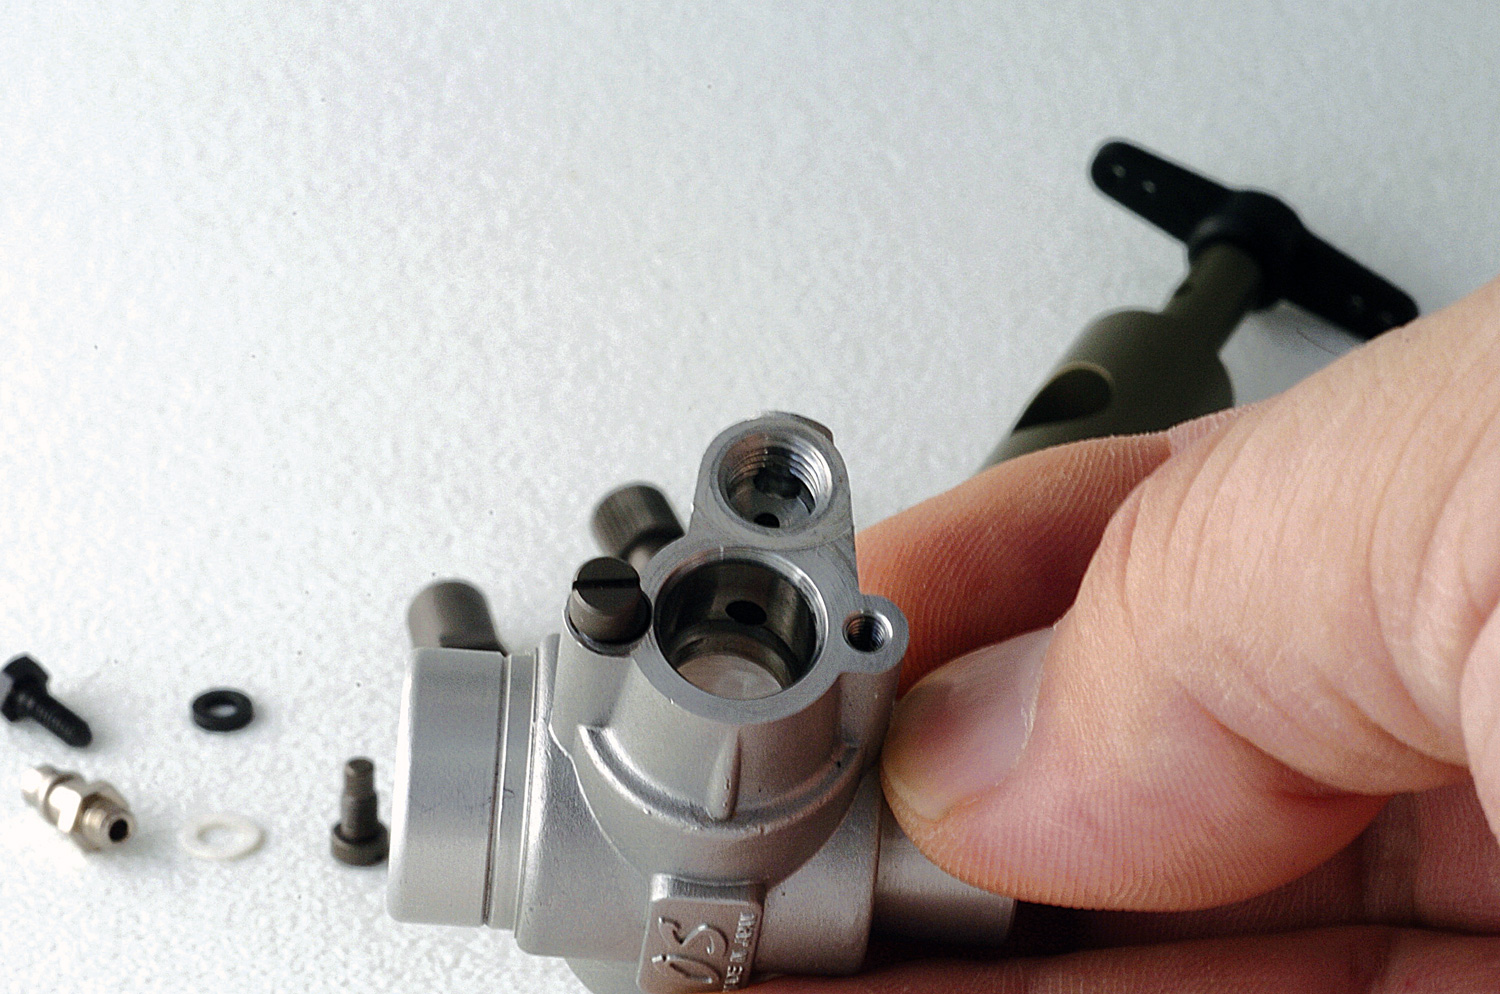
The above photo also illustrates the cam-action of the mixture control assembly perfectly. As you can see, it's machined in such a way that as you rotate it, the eccentric body of the screw serves to adjust the rotation of the brass mixture assembly.
8. Remove the fuel nipple using the 5 mm socket. Again, this is a prime source of trouble if debris has lodged itself within the bore of the nipple itself. Sight down it carefully and ensure it's clean!
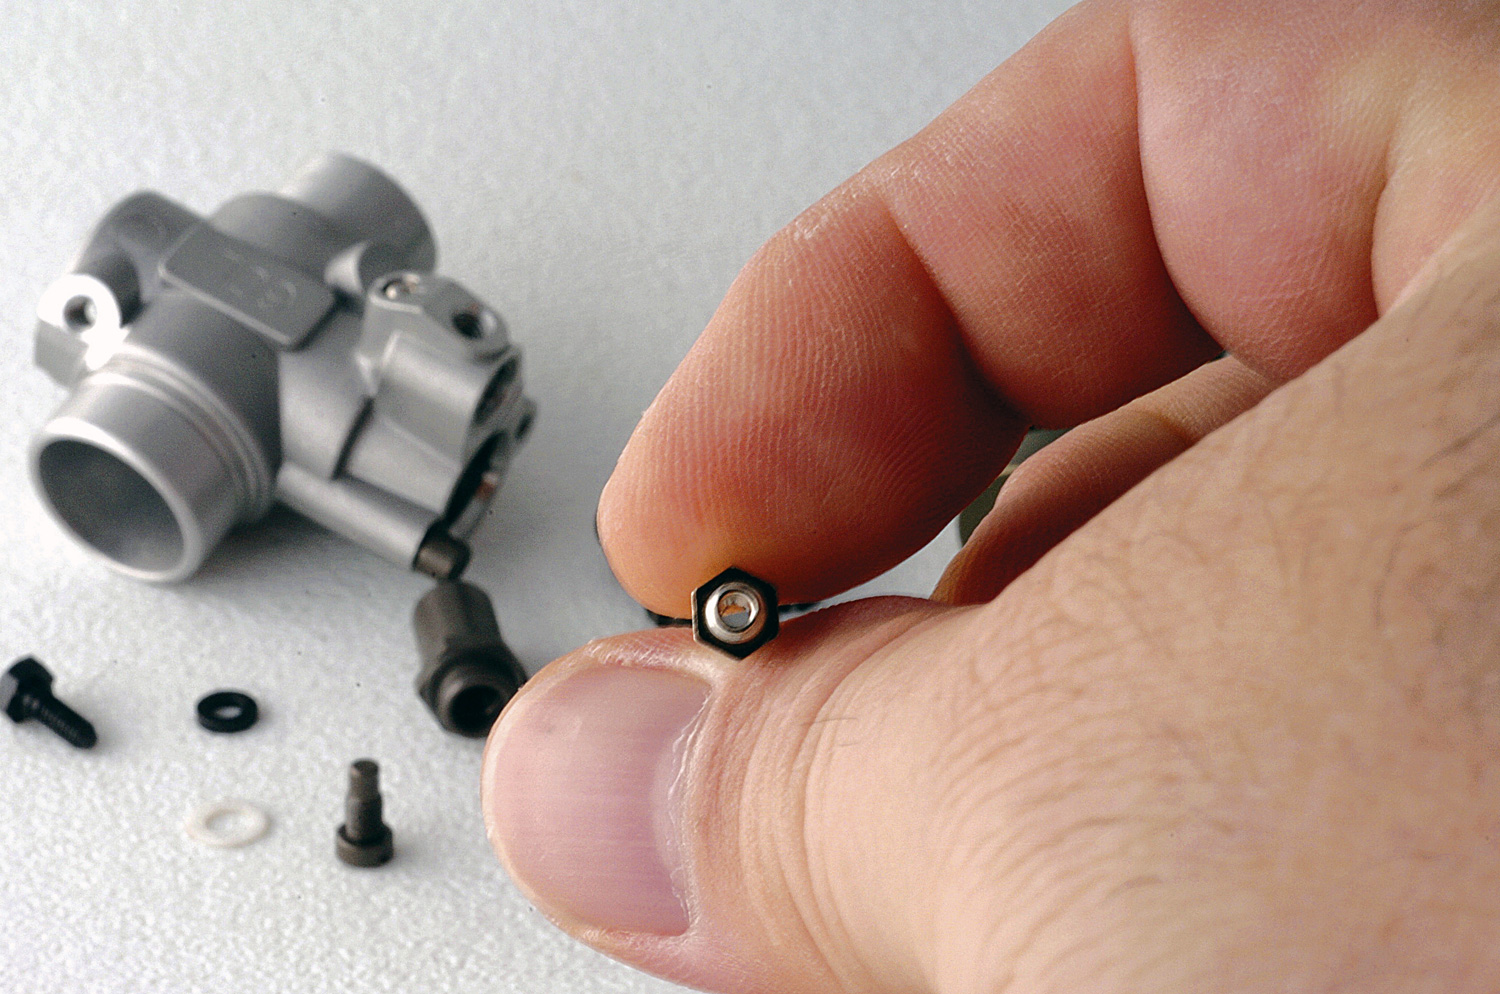
The passage through this piece is also subject to obstruction and for the best way of cleaning this tiny passage, I use spray cleaner and compressed air! However, it's important the spray cleaner you selected be of the kind which won't damage the tiny o-ring . . . you've been warned! Of course, you can remove it first, but getting it off without damage is a matter of holding your tongue just right, plus a bit of luck. Now rotate this little rascal in your fingers so that you can see the slot which engages the pin in the throttle body (to align the piece properly).
This completes disassembly.
INSPECT AND CLEAN
Inspect for swarf and trash that may block passages in the carburetor body and parts. This may impede proper operation. Making sure to wear eye protection, clean the metal parts using spray cleaner and/or compressed air, as needed. If needed, a wood or plastic toothpick may be suitable for aiding in the removal of debris in the passage. I strongly recommend against using metal probes to do this work as you may nick an assembly and thereby impair proper operation. Make sure to clean and blow through all passages in the carb body. Inspect again!
RE-ASSEMBLY AND INSTALLATION
Re-assemble the carb in the reverse order of disassembly. Re-install the composite washer, fit the o-ring, and align the carb. Then press down on it with your thumb (to ensure the o-ring makes a good seal with the crankcase) and tighten the draw-bar with the 2 mm Allen driver. While there are some who will suggest leaving this composite washer out, it's not a cheap item to manufacture (eyeball it carefully edge-on and you'll see what I mean) and thus, I’m of the opinion that if it were superfluous part OS Engines would have never installed it in the first place!
That’s it, put your engine back into your helicopter and go fly! The needle valve setting will likely be slightly off. Presuming the engine was fully broken in, something around 1-1/2 to 1-3/4 turns from fully closed will be close enough to get going.
PERRY CARBURETOR
Earlier I alluded to similarities in the way low-speed mixture is handled between the OS 60L carb and Perry carburetors. The Perry carb, instead of having an eccentric screw for control, had a slot machined in the end of a disk. Using a small screwdriver to turn it CCW richened the mix (as denoted by the + symbol).
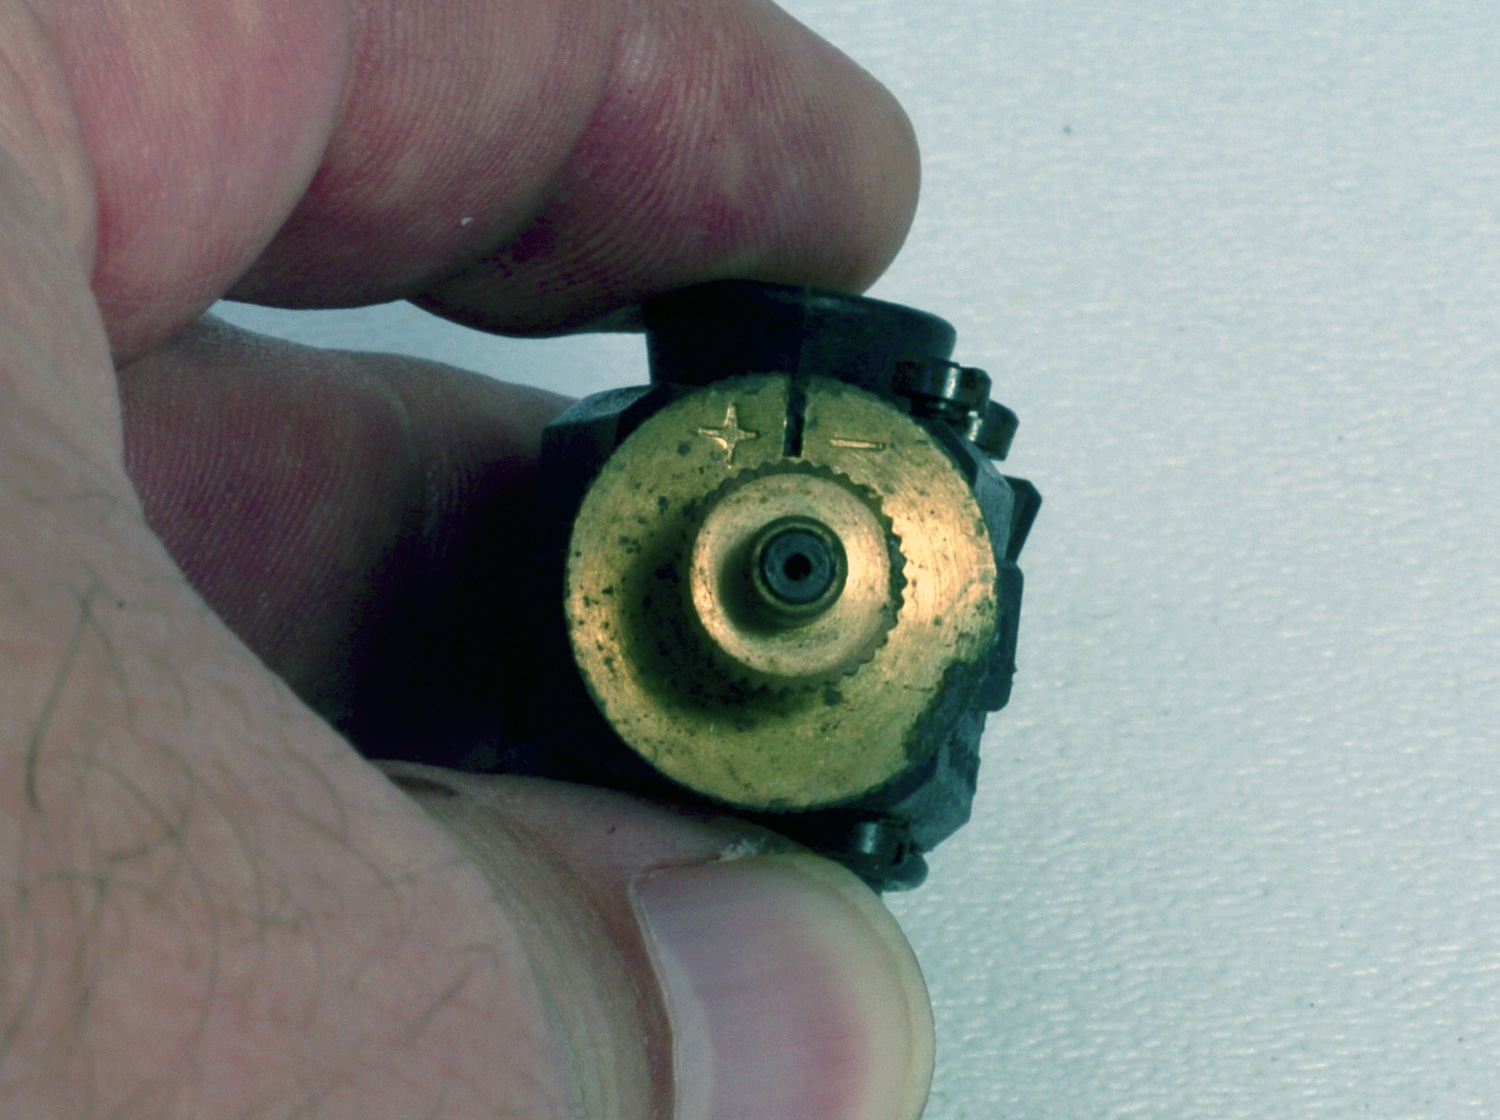
A disassembled Perry carburetor will lead you to understand why I compared it to the OS 60L carburetor. They share a similar design for achieving low-speed mixture. In the old days, though widely acknowledge for superb mixture control, some old timers didn't like how easily the tiny slot would get clogged by debris . . . so in turn, I became a master at the field stripping it!
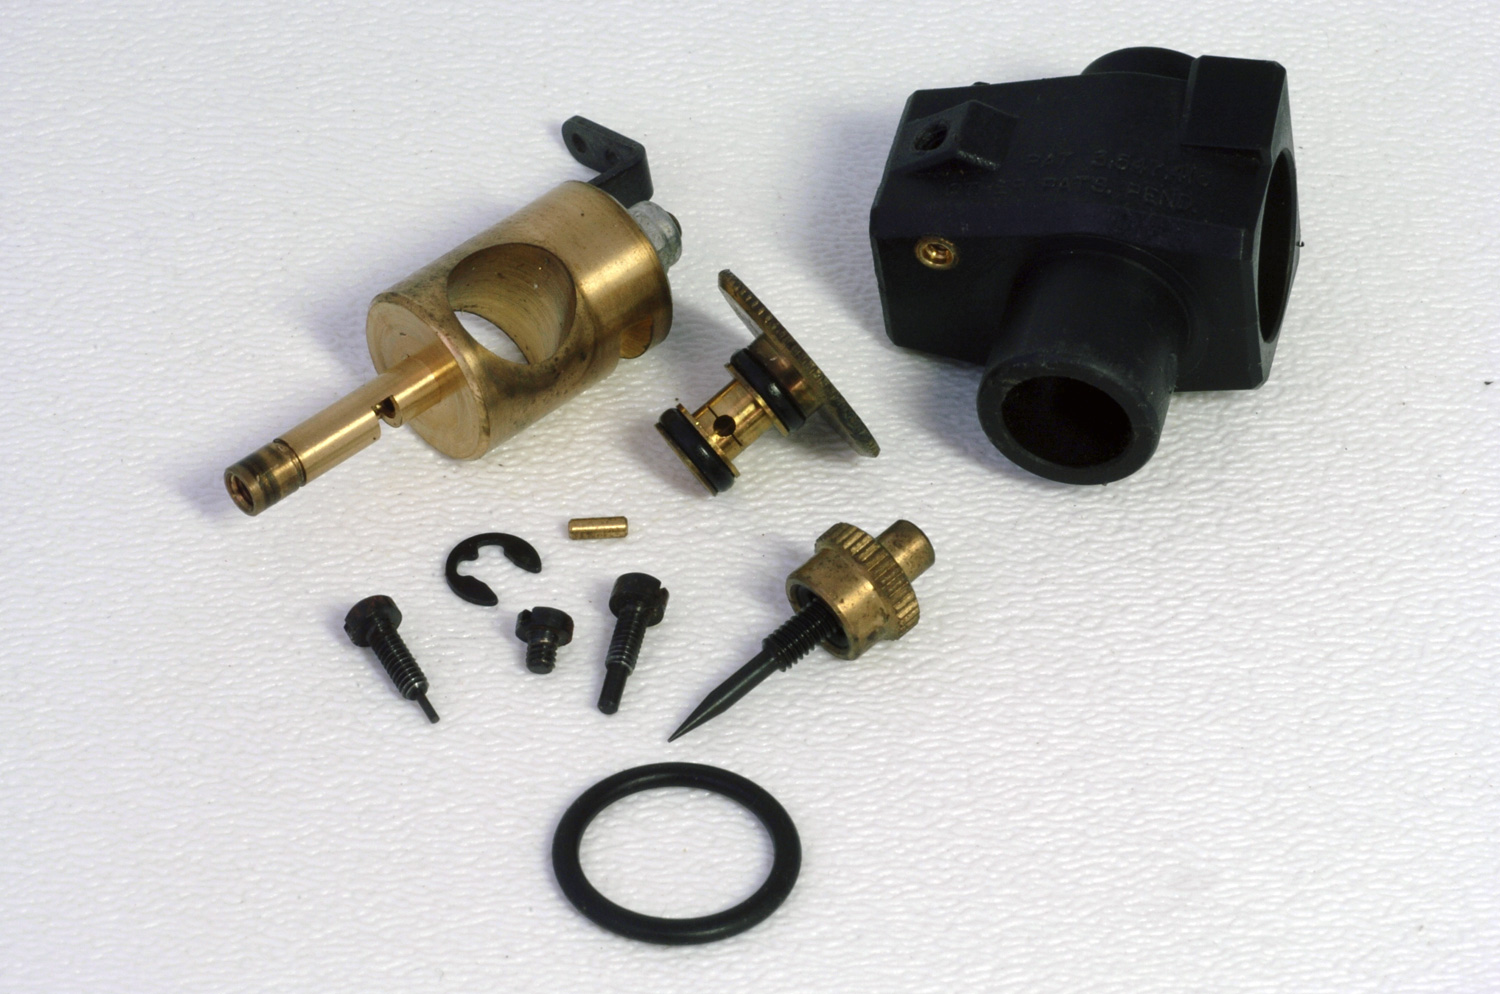
And this brings us to a close. When the engine isn't running well, and if a new glow plug doesn't sort it, plus you've confirmed there's no air leak at the feed line (bubbles visible in the line), you've even tried another batch of fuel, and especially important, you've ensured the bolts securing head, backplate, and carb are tight (again, so there's no air leak), then it's time to disassemble the carburetor to inspect for foreign matter obstructing the fuel flow because this will make an engine run poorly.
Field stripping a carburetor, a teardown to clean and inspect is an easy job once someone shows you how. This has been the purpose of this white paper. And what's astonishing is how similar other brands of carbs operate – all using similar principles – which means once you know how to do one carburetor, then you won't be afraid to tackle another. Good luck!
--
John Beech
GM (and janitor)


